Welcome! How about the fabrics that your clothes and accessories are made from, does that matter? Tell me you don't like comfy cotton, and there is nothing like warm wool or a wool blend to cozy you up, and tell me you don't love silk-it may take a little care-but it is simply fantastic. Today we are having a blizzard in Minnesota, I will be reaching for a sweater to layer for sure! I am going to enlighten you to fabric and how it fits into color magick when you face the mirror and endeavor to face your day.
I forgot two colors last night, grey and silver. If you have not read my last post, do yourself a favor and scroll down when reading this and embrace it; colors not only impact us, they impact those we encounter throughout our day and can be used to our advantage to manifest what we wish.
Grey- Illusion, neutrality, glamour, promotes invisibility (remember that when combining items to wear), neutral color, wear with other colors it adds to the magick!
Silver-Self-respect, spirituality (imagine it with lavender) reduces fears (I could use that some days) pumps up feeling of safety, spirituality, security, if you believe in such things it is the Goddess color, motivational, receptiveness, and can be worn in jewelry too (I create a lot of jewelry-I will post some, and I primarily use silver and combine different colored precious stones-how effective)!
Back to the subject of fabrics or textile in you garments and accessories. Natural fibers are best, you already intuitively know this. You like the way they feel, breath, move. They are the best conductors of energy-your energy and the energy of those around you. One of my favorites and the one I tend to demand in my own clothing (especially being from Arizona) is cotton. Cotton increases clarity and is associated with the element of Air, no surprise. Even individuals who are sensitive to other fabrics can usually wear cotton. There is an ever increasing manufacturing (you can even find them at thrift stores) of cotton products. Advertisers have captured this in their campaigns: "Cotton, the fabric of our lives."
Silk is the most valuable and the most magickal of all of the fabrics. I acts as a protective shield, no wonder so many undergarments are constructed of silk. It protects you from outside influences or psychic energy or attacks (we mentioned that yesterday, those people or situations that drain the energy right out of you, give you a flush of anxiety, the ones you find yourself crossing your arms or legs over your body when around them for any prolonged time, the ones you feel your physical distance's presence and actually may take a step back). If you do Tarot cards or have some, silk is great to wrap around your cards to shield them from others emotions and vibes (I haven't lost you yet have I-read on). In fact silk underwear, a blouse or dress would be a great idea if you would like some self-assuring protection. And silk can be worn year around, especially under everything. If you live in a cold region, buy some silk long-underwear, or cooler buy a cami or slip, underwear or brassier. Silk is linked to emotions, intuition (who doesn't want that), Water, and shields negative energy. Choose color of silk carefully for VERY effective mirrored psychic armor!
Colorful clothing combinations can add to your intentions for your day and your life. I like to have an array of colors to choose from. After practicing color magick, and choosing my intentions with what I wear, I have embraced hues of colors I never wore or seldom wore prior. Yellow for example, not my favorite, but combined in patterns within the fabric, or as an accent piece in a less threatening hue to my liking, it has been effective in my life. I know you have some gold jewelry somewhere.
For work you want to choose a fabric that projects an aura of power, boosts your confidence, or you may choose to blend in unnoticed. By combining colors in your outfits, you can accomplish this, then by selecting items to add in a particular fabric, you are on your way to being proactive rather than ignorant to the effects of what you wear and how they affect you and the world around you. This is why I made my wall hanging (below post) to hang near where I get ready in the morning-my closet, which I am fortunate enough to posses a small room that was probably a Victorian nursery at one time, to assemble myself for the day. It surrounds me in lavender walls, with positive and empowering sayings or quotes written selectively on the walls, images of things that are important to me, accessories displayed artistically so that when I enter the organized space (work clothes in one closet, every day by similar items and colors, layering pieces, dresses arranged just so) I get warm fuzzies like being around a close friend. Then I go to my wall hanging to look at the colors and how I want to use them, or I just feel like a certain color for the day. I have hooks to hang different combinations, and then I put them on thinking about my day and the intention I have for it, say a few positive words I have written down, smile confidently in the mirror (full length of course) and I am out the door to enjoy the present I have been given to unwrap today.
Here are some of the things I say to myself which I have written down to consider which I borrowed from Ellen Dugan:
"*Today I will work with the powerful energy of color red or other to manifest success.
*Today I utilize the gentle energy of color blue or other and will be more open-minded, sympathetic, and compassionate.
*Today I harness the power of color yellow or other, may it bring illumination and boost my communication skills.
*Today I work magick of the color black or other, I build my shields with strength and reject my coworkers' power to make me uncomfortable."
You get the idea and can write affirmations ahead of time or just say a positive affirmation correlating to the color of choice(s) for the day.
Then Ellen suggest visualizing light and energy (don't freak out if this seems a bit out there because visualization is used by the most successful companies and individuals of the world) flowing around you, wrapping you up with strength (change the words to me on your hanging or poster). You may even notice a "tightening of the solar plexis or a warm feeling." Now thoroughly "woven" in magick around you, you can make a positive affirmation for the day, take a deep breath, letting it out slowly and center yourself. If you do meditation you know what I mean. Then flash a smile in the mirror at the most important person you know-yourself! Now you can confidently head out to your day knowing your personal power and the choices you have consciously made for yourself and work and practice your own personal magick.
One more note. Most individuals practice some form of prayer, meditation, intention, wish, dream in their lives. I am not talking about religion. For instance, nature is very important to me and my spirituality, it is my church if you will. I pay attention to what is around me and embrace my encounters throughout the day, flowing like water around any obstacle that may come my way. But there are moments my feathers are ruffled, I feel uneasy, I have a feeling I do not like like frustration, anger, sadness, anxiety, fear, depression, anticipation, stress, etc. When I feel these things I stop and ground myself. Sometimes I will even excuse myself from others and public bathrooms are an asset to society. I can close my eyes in the stall and surround myself with goodness-tap into what I believe (for you it may be different than others) is in charge or the energy of whatever you believe in to center myself, to ground myself, to take a deep breath and say something positive to myself so I don't give away my power! I do not need to allow situations or others to throw me about in my own life, I do that enough. So centering and grounding when away from my home where I meditate and practice my faith is invaluable!!
Think then before you re-enter your life, about what you are wearing, about what you said prior to going about your day, visualize the power and energy in the choices you made when getting dressed. It is still with you right now, use it. You will be amazed when you tap into this magick how it can enhance your spirituality and self-worth, your confidence, how you see yourself. And no clothing or accessory can project your positive self-perception more that how you really feel about yourself. You think others can not see this, but they can and they use it to their advantage. So I ask you, why are you giving your power away. Why not keep it and use it to your advantage, for good. Why not use what the Universe has given you to make yourself, those around you, and the world a better place rather than knocking everything and everyone down around you without conscious effort. Well, you have now been informed, enlightened to the impact the items you wear and carry have on life. There is no turning back so arm yourself and enjoy a more positive life, because if you project positive-watch-you are going to get a lot more of it back. If you want to read more about this subject any of the books by Ellen Dugan are great. I thank her for enlightening me and give her kudos as a mentor and teacher. And don't forget to scroll down if you have not read the power of the colors you wear and harnessing that energy.
Later, Colleen
Sunday, January 26, 2014
Color Magick-Manifest what you want with colors you wear
I want you to keep an open mind and think about what you feel like when you see or wear different colors. You have heard of the black suit being the power suit, or perhaps navy. When you wear a certain color you feel safe, cheery, have lots of energy, feel like you are on top of the world! Well I will give you some information on colors and their magick when you choose your outfit for the day, an event, or based on how you feel when you wake up or have to approach something you are unsure about.
When upcycling think about what you want to portray, how you want to feel, what you like (there is a reason you like a particular color you know), what you will use it for, or just to express yourself. It will definitely get you thinking when you go to your closet and then you can look yourself in the mirror and seal your intention for the day, give yourself a great big smile, and be on your way confidently.
First of all I believe in miracles, many know the power of positive thinking, having a positive intention for something you want to manifest in your life is not a new concept. So why not use this when you get dressed. Why not think a bit more about what you want to do or say with your day and dress the part, walking out of your closet or dressing room with confidence that you will welcome what you wish for yourself. Are you with me-here we go!
I made a fun hanging (nothing special) as a reminder to myself-because I can not remember this all every morning when I get dressed. But as I practice this I do start to think about the meaning and power of the colors I am wearing and some of it actually sticks with me.
Color Magick
Brown-warm, comforting, grounds and helps quiet a mind that won't turn off, nonthreatening, Earth, soothing.
Burgundy-red (power) and black (protection) mix. Protect from needy/emotional people from psychic vampires (oh come on, I know your thinking of a few by name right now. They suck the energy right out of you-even from a distance).
Mauve-intuition, lessens mental confusion and sensations of overwhelming people or stronger personalities. This color is like a lighter burgundy (above).
Coral-(hot pink/bright orange) is an assertive color, impression of confidence and extreme assertiveness, approach-ability, for meeting, presents you in the best possible light-your best self.
Yellow-Sunshine today, promotes personal vitality, brightens mood, reduces depression, Air, communication, flow of ideas, professional talents shine to best advantage.
Neon Green-Apple, lime, stimulates, gets you and others fired up, encourages new business opportunities.
Royal Blue-Electric, dynamic, strong, boost, prosperity of planetary energies of Jupiter, movers and shakers, grabs attention, forceful color, uplifting, protective, and powerful.
Dark Blue/Navy (blue/black)-Respect, confidence, creates impression of emotional distance, opposite of softer tones of blue-keep that in mind.
Lavender-Relaxing, brings out inner-beauty, calming, wear with a crisis or deadline, Water, encourages tranquility and helps counteract jealous coworkers.
White-Teaching and healing, use in small amounts, try shirt, blouse, sweater, part of a garment, warm up with ivory.
Black-Power, intrigue, mystery, authority, fashionable and dynamic, establishes boundaries, can create a color shield-if feelings get hurt easily, can attract attention or deflect it, choice and power to wield that type of color is magick but it is up to me.
Pink-Reduces stress, relaxes wearer, soothing, receptive, soft fuzzy feelings-offset with navy/burgundy will project compassionate, relaxed individual who is secure and confident-own style.
Red-"I am in charge," passionate, dynamic, Fire, strong intense emotions, full attention, vibrant, strong, and intense.
Orange-Confidence, energy, enthusiasm, garner all the success you deserve, boost self-assurance and personal energy.
Green-Promoting career objectives, brings prosperity, good luck, growth, health and strength. Chakra is Energy, it is the color of life. Stay gently grounded, excellent link to Earth and all it's magick.
Turquoise-Mystical-green and blue means healing protection, relieving stress, pulls up strength from deep inside yourself.
Blue-Soft, healing color works wonders in making magick in your wardrobe, Water, emotions, psychic, receptivity, shades pastel to denim (no wonder we all wear so much of this-right), open-minded, trustworthy, nonthreatening.
Purple (denim and purple are my favorite colors)-Favorite for magick, fame, riches, respect, spirituality, power, promotes inspiration, and imagination.
Now given all of this information some of you are with me, some can't wait to get started, and others are skeptics. So I challenge you to experiment with colors and see what you find out-put this information to the test. And when you see that it is real, it will be a useful tool to manifest in your life what you truly want, enjoy, and ultimately, what will make you happy.
Tomorrow I will blog about different materials and their magick (are you with me-good). There are also colorful configurations that work to project what you intend or what you need for that day. There are days you need protection, and if wearing the right clothes helps, why not. I will expound on this and some things you can say to yourself, an exercise to prepare you for the day as you smile confidently at yourself and go out to accomplish what you will. Later, Colleen
When upcycling think about what you want to portray, how you want to feel, what you like (there is a reason you like a particular color you know), what you will use it for, or just to express yourself. It will definitely get you thinking when you go to your closet and then you can look yourself in the mirror and seal your intention for the day, give yourself a great big smile, and be on your way confidently.
First of all I believe in miracles, many know the power of positive thinking, having a positive intention for something you want to manifest in your life is not a new concept. So why not use this when you get dressed. Why not think a bit more about what you want to do or say with your day and dress the part, walking out of your closet or dressing room with confidence that you will welcome what you wish for yourself. Are you with me-here we go!
I made a fun hanging (nothing special) as a reminder to myself-because I can not remember this all every morning when I get dressed. But as I practice this I do start to think about the meaning and power of the colors I am wearing and some of it actually sticks with me.
 |
| My dressing room is actually lavender, but here is a picture of the wall hanging inside the door that I can glance at when choosing outfit for the day. |
 |
| This is a blurry picture of a close up of some of the colors and their meanings towards manifestations. |
Brown-warm, comforting, grounds and helps quiet a mind that won't turn off, nonthreatening, Earth, soothing.
Burgundy-red (power) and black (protection) mix. Protect from needy/emotional people from psychic vampires (oh come on, I know your thinking of a few by name right now. They suck the energy right out of you-even from a distance).
Mauve-intuition, lessens mental confusion and sensations of overwhelming people or stronger personalities. This color is like a lighter burgundy (above).
Coral-(hot pink/bright orange) is an assertive color, impression of confidence and extreme assertiveness, approach-ability, for meeting, presents you in the best possible light-your best self.
Yellow-Sunshine today, promotes personal vitality, brightens mood, reduces depression, Air, communication, flow of ideas, professional talents shine to best advantage.
Neon Green-Apple, lime, stimulates, gets you and others fired up, encourages new business opportunities.
Royal Blue-Electric, dynamic, strong, boost, prosperity of planetary energies of Jupiter, movers and shakers, grabs attention, forceful color, uplifting, protective, and powerful.
Dark Blue/Navy (blue/black)-Respect, confidence, creates impression of emotional distance, opposite of softer tones of blue-keep that in mind.
Lavender-Relaxing, brings out inner-beauty, calming, wear with a crisis or deadline, Water, encourages tranquility and helps counteract jealous coworkers.
White-Teaching and healing, use in small amounts, try shirt, blouse, sweater, part of a garment, warm up with ivory.
Black-Power, intrigue, mystery, authority, fashionable and dynamic, establishes boundaries, can create a color shield-if feelings get hurt easily, can attract attention or deflect it, choice and power to wield that type of color is magick but it is up to me.
Pink-Reduces stress, relaxes wearer, soothing, receptive, soft fuzzy feelings-offset with navy/burgundy will project compassionate, relaxed individual who is secure and confident-own style.
Red-"I am in charge," passionate, dynamic, Fire, strong intense emotions, full attention, vibrant, strong, and intense.
Orange-Confidence, energy, enthusiasm, garner all the success you deserve, boost self-assurance and personal energy.
Green-Promoting career objectives, brings prosperity, good luck, growth, health and strength. Chakra is Energy, it is the color of life. Stay gently grounded, excellent link to Earth and all it's magick.
Turquoise-Mystical-green and blue means healing protection, relieving stress, pulls up strength from deep inside yourself.
Blue-Soft, healing color works wonders in making magick in your wardrobe, Water, emotions, psychic, receptivity, shades pastel to denim (no wonder we all wear so much of this-right), open-minded, trustworthy, nonthreatening.
Purple (denim and purple are my favorite colors)-Favorite for magick, fame, riches, respect, spirituality, power, promotes inspiration, and imagination.
Now given all of this information some of you are with me, some can't wait to get started, and others are skeptics. So I challenge you to experiment with colors and see what you find out-put this information to the test. And when you see that it is real, it will be a useful tool to manifest in your life what you truly want, enjoy, and ultimately, what will make you happy.
Tomorrow I will blog about different materials and their magick (are you with me-good). There are also colorful configurations that work to project what you intend or what you need for that day. There are days you need protection, and if wearing the right clothes helps, why not. I will expound on this and some things you can say to yourself, an exercise to prepare you for the day as you smile confidently at yourself and go out to accomplish what you will. Later, Colleen
Saturday, January 25, 2014
DIY No Sew Shrug


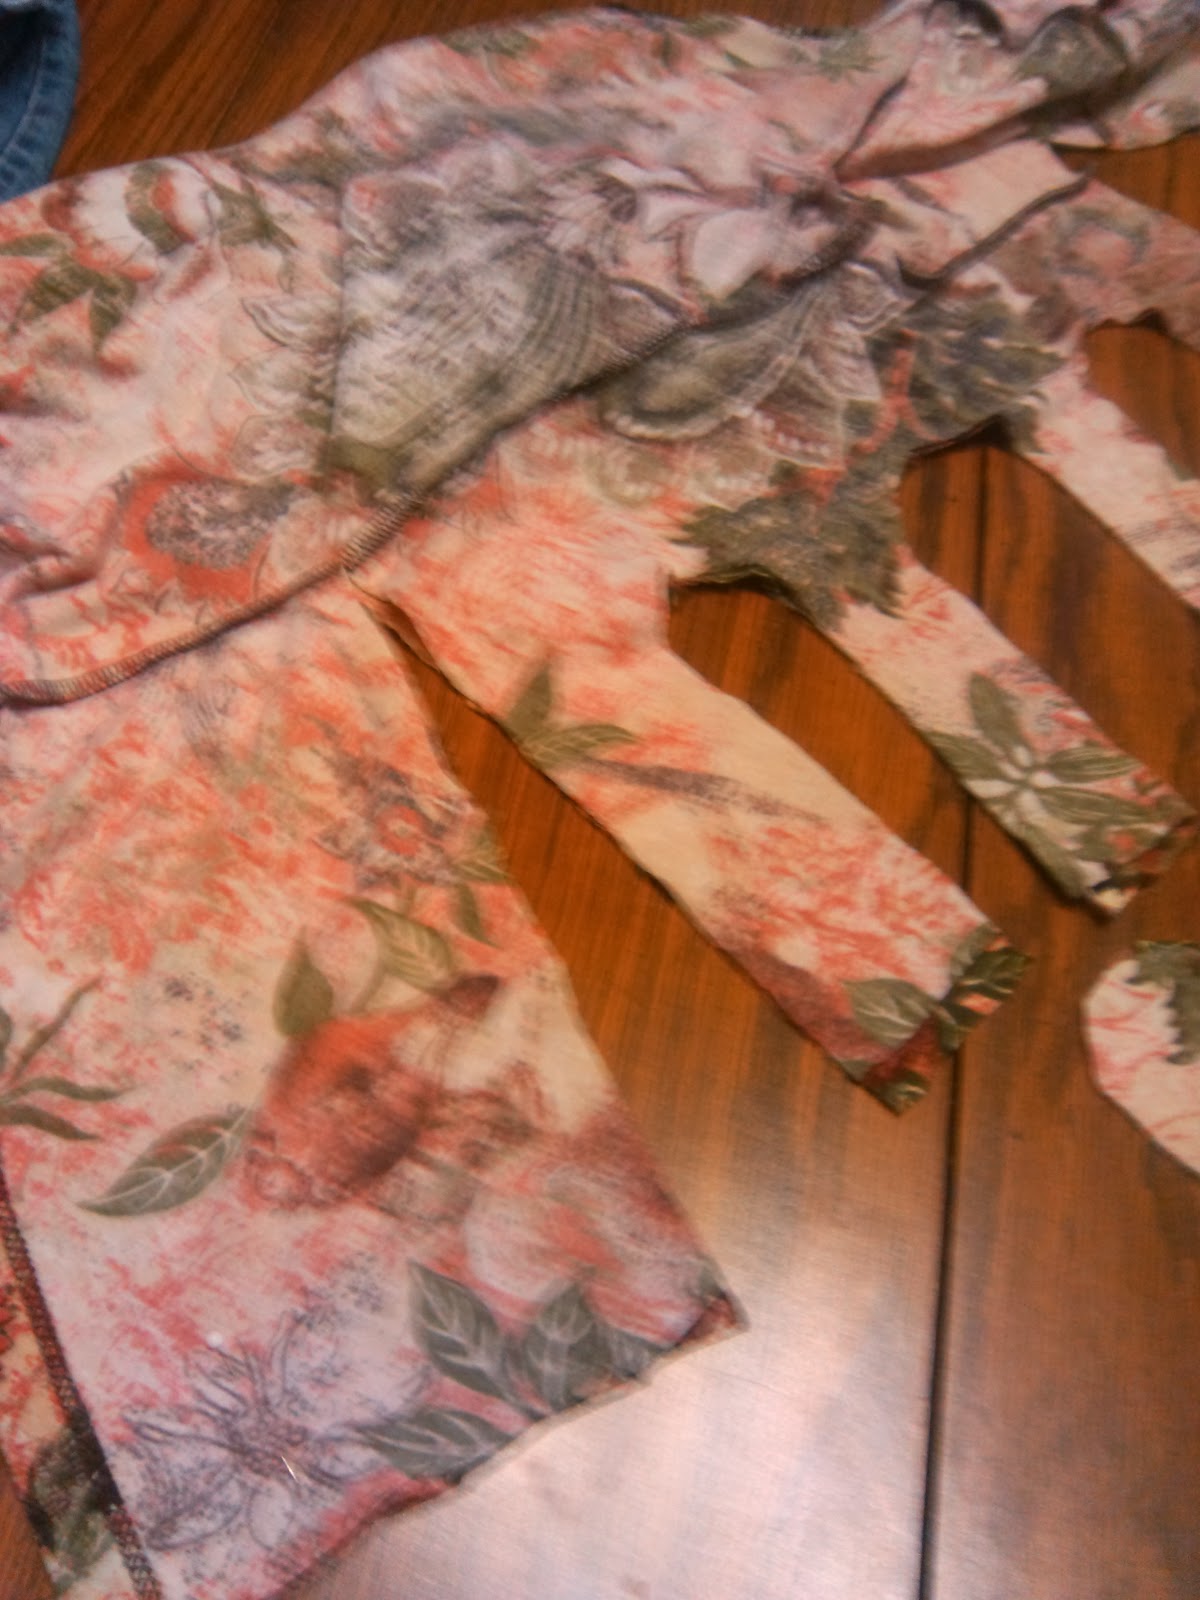
Here is one way to cut the shrug using the cuts as patterns to cut around. This was a turtleneck that I could die but simply turned it inside out (I like to break the rules) prior to tying. It is also an example of a looser shrug-I like them tight too, but that is just me.
 Lay shirt out with the back side up and cut up the center from the bottom. I cut just to the collar because I may use the collar for something else later (I keep bags of scraps and create applique collages-later on that).
 Do the same for the front and then cut your neckline to the shoulder seam. I cut lower in the front.
 I eye the other side and cut wabi-sabi (perfection in the imperfection). After the front and back are cut, meet up with your other cut even if you have to cut off a bit of material so it matches. The cut matched up in the middle between the sleeve and collar seam but you experiment what you want-closer to the collar seam if you don't want to have option of wearing off shoulders or if you want more coverage than the photo.
 Should look like this. Now do back first so you should have it with the back side on top facing you.
 I like the ends I tie to be a bit wider so when you make first cut curve in as you cut and decide how far in you want the openings. They can be wider or narrower than I have them. Once you have made one cut, flip the scrap and match it about where you cut on the other side (it will be the wrong side of material up because it is a mirror of the other side).
 Do this (using the same piece as pattern) all the way down on each side of front until you have 3 cut on each side (total of 6). Then but the bottom off to the side seam.
 Now start on front using the same pattern as back or creating a new pattern on the front and working your way down eyeing placement so its sort of symmetrical. I opened up the shirt and you can not see the back here so I do not cut through what I have already done. Only the front is showing.
 Again, the pattern will be the wrong side when you place it across from cut to complete cut on other side.
 Complete cuts on both sides. Over half way done with my shrug and it is taking minutes!
 On the front I cut 3 on each side on the back (total of 6) but decided to cut one off so it would be shorter-your call. Now we are ready to cut the bottom portion off. You can decide how you want it to fit. I like it just under bust and longer in the back. Another example later shows it to the waist.
 Cut downward to the back cut and match up.
 Here is the other side cutting off the lower portion from the front to the back. This pic shows how I decided to cut off the bottom two of my 6 cuts leaving me with only 2 on each side (I don't like the front higher than the back).
 Now tie the front and back together loosely from top to bottom, you can adjust the ties later to fit you when you try it on-I can do it myself in a mirror for the back.
 Here is the finished product! I turned this inside out before I tied it because I wanted the seams to show and the inside was a dull color. I might show it dyed later, you never know. You can always dye anything that is dull-100% cotton works best and I will share dying later-I was lazy today so I could show you a few examples.
Way 2 to make No Sew Shrug:

 Here is the finished product of the shrug. I cut through seam at shoulder because I wanted to show off my butterfly tatoo. I have it over another upcycle project of marrying a skirt and tank top that I appliqued over the skirt in the front.
 Lay out shirt and smooth out cut the front up the middle through the collar both front and back.
 Should look like this. Now pin the front two sides together at the edge of your cut.
 Cut off the front around collar and begin your cuts. I made three-cutting through both sides, make sure you pin well so they match.
 Should look like this! Save your scraps for another day-it is fun to have lots of scraps in same color pallets for later. I use bags I can see through.
 Now cut bottom to the side seam.
 Now pin the back and do the same-make sure you pull sleeves out of the way so you don't accidentally cut them.
 Now cut to meet the other side.
 Time to tie. If you have pattern side I pinch wrong sides together so pattern is up for tying.

 Tie all the way down the front and back-again-you can adjust when trying on.

 Should look like this!
 Your done in minutes-easy right. I show it here with a 20 minute skinny I made over a spaghetti strap cami. Now I can wear that cami in the winter.


Here is another one I made in a much too small t-shirt I got for 25 cents at a garage sale in the summer. Cute right!
 Enjoy experimenting and taking a break from your sewing machine. You could make cuts around shoulder to expose the shoulder or cut away material all the way down the sleeve to expose your arm, tying at the sleeve. I have also cut out patterns on the sleeve like circles and squares. You can use short sleeve t-shirts if you live somewhere warmer or when the snow melts. Have fun and talk to you later.
Good morning, or is it afternoon, to you all. Here is the no sew shrug I promised. I have three examples and a couple of ways to construct it-one will make more sense to you. Feel free to experiment with different fabrics and cuts and post what you came up with-I would love to see them.
You will need scissors and start with your least favorite shirt for your first one in case you do not quite like it. I have cut many of these for myself and friends and it is a creative process with new ideas and modifications but I will just show you the basic cuts.
You can wear this over spaghetti straps, tanks, even long and three-quarter sleeves as an accessory. I like them here in Minnesota in any season but the summer to wear as a layer of warmth. But this shrug expands my wardrobe allowing me to wear cooler styles in the off seasons and it is a layer over, not under, so if I get warm, I can peel it off.
Tutorial:
Way 2 to make No Sew Shrug:
Here is another one I made in a much too small t-shirt I got for 25 cents at a garage sale in the summer. Cute right!
Friday, January 24, 2014
Etsy shop is up and it is under Colleen Brobeck on your search where I have upcycled garments and accessories. I am loading over 100 items this weekend so it may take a few days-check back in! You can reach me at Colleen Brobeck for Facebook personal page and Colleen Hogan Brobeck for business Facebook. I also have another blog-very informal-and open to your passions for posting and to express myself away from the focus of my upcycling, which is a big part of my life, but I do have other interests. I am a writer and multi-media artist as well as passionate about many things, are you? Come visit then at www.magicalthreadsandstiches1@blogspot.com but if you do search on blogspot I had to put magical threads and stiches 1 and it came up. It is associated with my business by email only but I will have links to both eventually.
I wanted to tell you how much I appreciate you and that I would like you to follow me and comment if you find my posts useful. If you can send a picture of your upcycle too that would be great. I will also be running a campaign or contest for a garment of your choice free for winner of pintrest post on my other blog about art, poetry-your own please, or upcycling. You can vote once and enter as many times as you wish-details coming soon when I get it set up--how much fun, right!
Finally, I hope you are living in the present and unwrapping it because it is the only day in your life like this one. No matter what is going on in your life you can still have a good day because you should celebrate how fabulous you really are. If you do not think so who's going to-right! So do something great for yourself today or tomorrow-something you really like or brings you joy. I love upcycling and sharing with you, watching a good movie, reading a book, creating something I have been thinking about.
Thursday, January 23, 2014
Upcycle Sexy Denim Skirt
SEXY
 |
| Side view check out the rear-right! |
You can make this skirt any length you want but I did a hi low (slightly), tattered the bottom and front, and put inset in front for posterity but you could easily leave out the insert if you are more daring. The pictures show how your rear end looks great hugged by the rushing detail. Takes a little time but worth it.
Sexy upcycled denim skirt:
 |
| Rear view |
 |
| Front view Here we go!!  |

 This is what it should look like when done.
 |
| Now cut up back inseam leaving just a little denim. |
 |
| My cat Star decided she wanted to be part of the fun. Start pinning from the bottom, overlapping the material from back easing it as you go up. You may need to re-position pins as you want it to lay fairly flat going up. |
 |
| As you move up overlap where you cut the seam in the rear. Really does not matter which side you cut. |
 |
| Almost there keep pinning! |
 |
| Should look like this when done. |
 |
 | |||||
Now you need to decide the length. If you want exaggerated hi lo you have to exaggerate because you are going to take up the rear in ruching which will affect the length. Now cut from split across to the leg seam.
Now go flip to the front and cut from your line through seam and curve upward to the end and through front on each side.  Should look like this.  Now cut along the seam (leave a little room) just below the zipper and pin the same way you did the back overlapping so it is flat.
 Now fray the ends by pulling toward the seam that will fray with your fingers. You can trim if you need to but I did not do much trimming around the bottom of the skirt.   Now fray the inside front of slit in skirt. You will have to pull threads towards where they come from to fray (usually to the bottom on one side and the top on another). Work all threads to the seam as much as you can.  I trimmed these strings and it looked like this.  Now you are going to start at top and pin tucks that we will sew down. There are a lot of pins and you have to remove them as you go. We will sew zig zag stitch close to the fold of material and then leaving needle in and switching to zig zag stitch we will go along the edge of material or just inside the material underneath. You can feel it as you sew your wayback. This leaves the ruching flat and hugs the rear end. You decide how many to do but make sure you have a fold under pockets so it will hug rear. In pic I sewed the top of fold and am on my way back with the bottom. Note: When you go over seam, go back and forth a few times to secure thread and wear and you may need to adjust the foot so it goes up over center seam. This is when it is important that you have a heavy needle or denim needle-or your thread may keep breaking (or the needle-oh no).  Pull the thread from to thread and cut close to the fabric-you don't want to keep taking project out of machine we are using quilting technique of continued stitch underneath. Then re-position your next ruche and repeat until all are done. I looked about where I started when finishing each one. Pull the thread from to thread and cut close to the fabric-you don't want to keep taking project out of machine we are using quilting technique of continued stitch underneath. Then re-position your next ruche and repeat until all are done. I looked about where I started when finishing each one. You can really see my stitches here, almost done!  Now turn over and cut the connected bobbin threads.  Cut the bottom of one of your legs where it is worn to your liking and pin inside your slit (if you wish) and make sure it is laying flat. Place it however hi or low you feel comfortable wearing a skirt slit.  When cutting insert-cut more than you need up to crotch area. When cutting insert-cut more than you need up to crotch area. Now pin inside and make sure you pin all of it or you may sew over something you don't want to.  Now sew with straight stitch along seam on inside then sew across bottom to the outer seam and sew your way back. Double seaming will assure it lays flat.  Sewing back around.  Remove all pins and turn inside out. Front should look like this.  Now cut as close as you can without cutting through stitch and trim all excess material.   Congrats! Now wash and dry it a couple times to get the fraying and for the garment to adjust to its new state. This skirt can be done many ways. I will post the "Mermaid" version with side ruching/lacing and inserted ruffles tomorrow. Please comment and enjoy! I did not get to no sew shrug. Will be up later tonight or tomorrow morning! Take care<3 |


Subscribe to:
Posts (Atom)